ROAD-TRIP GEAR · AIR IS NOT A REPAIR
Family Tire Inflators: 12V vs Cordless vs Foot Pump—and the Pressure-Gauge Rule
Buy for the vehicle's placard, the power source you can prove, and the tire you can safely reach—not for the loudest pressure number on the box.
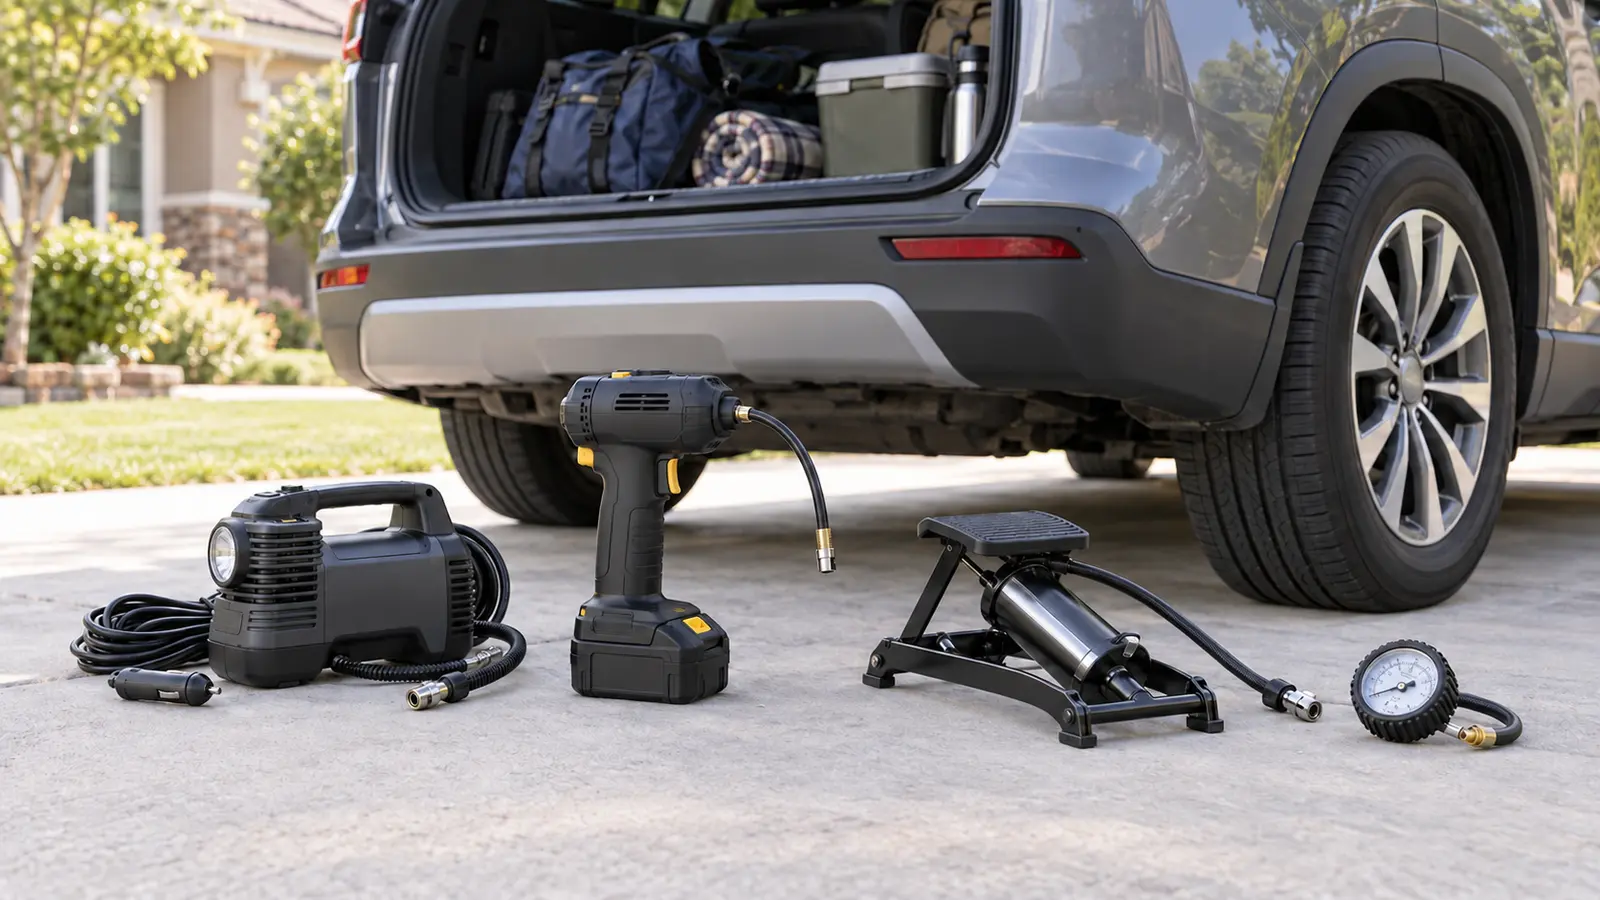
The pressure number that matters
NHTSA says the vehicle manufacturer's recommended cold tire pressure is on the Tire and Loading Information Label—usually on the driver's door edge or doorjamb—or in the owner's manual. That is the target. The pressure molded into a tire sidewall is not the vehicle's recommended setting.
“Cold” means the vehicle has not been driven for at least three hours. NHTSA recommends checking every tire, including the spare, at least monthly when cold. A tire-pressure monitoring system is a warning system, not a replacement for the gauge: NHTSA notes that the dashboard warning activates only when a tire is significantly underinflated.
Write the front, rear and spare targets on a card in the glove box. Some vehicles specify different front and rear pressures. If a tire repeatedly loses pressure, has a cut, crack, bulge, vibration or other damage, stop treating air as the solution and have a tire professional inspect it.
Choose the power system first
12-volt plug-in inflator
A corded compressor fits the family that wants a tool to live in one vehicle and can verify the vehicle's power outlet. It avoids maintaining a separate battery, but only if the plug matches, the cord reaches all four tires, the outlet can supply the required current and the vehicle manual permits the operating state the inflator requires.
Measure from the outlet to the farthest valve stem along a safe path, not diagonally through open doors. Check the inflator's maximum current against the vehicle outlet and fuse information. Never replace a fuse with a higher rating to run an accessory. If the manual requires the engine to run, use the tool only outdoors with clear ventilation—never in a garage or enclosed space.
Cordless inflator
A cordless tool removes the cord-reach problem and can move between cars, bikes and sports gear when the maker approves those uses. The tradeoff is another battery system. Check whether the battery and charger are included, whether the pack fits tools the family already owns, how charge state is shown and what storage temperature the manual permits.
A battery left uncharged or cooked in a hot vehicle is not emergency equipment. Follow the battery manufacturer's storage and charging instructions. Inspect it for swelling, damage or unusual heat, and stop using damaged lithium-ion packs. Do not charge loose or unattended in the cargo area.
Manual foot pump
A foot pump is slower and requires physical effort, but it has no electronic battery and can handle small corrections when its connector and pressure range fit. It can be a strong no-complexity choice for bicycles and occasional top-ups. It is a poor fit for a large vehicle tire that is far below target or for an adult who cannot operate it steadily.
Read the pump's intended uses, stable-footing requirements and gauge instructions. A tiny built-in dial is not automatically accurate enough to replace a separate gauge.
The six compatibility checks
- Target pressure: confirm the vehicle placard, including any different front, rear or spare value.
- Power: verify outlet type, fuse/current limit, battery compatibility and the maker's operating instructions.
- Reach: test cord and hose routing to every valve while the vehicle is parked.
- Duty cycle: learn how long the unit may run and how long it must cool. A maximum-pressure number says nothing about sustained work.
- Gauge method: use a reliable separate gauge to verify final pressure; an auto-stop is a convenience, not unquestionable truth.
- Storage: keep the manual, adapters and power parts together within the published temperature limits.
Also check the exact model in the CPSC recall database. For a secondhand inflator, no label or readable model number means no reliable manual or recall check. Skip it.
The driveway setup drill
Do not discover the tool on a dark shoulder. On a dry driveway with cold tires, read the vehicle and inflator manuals. Locate every valve and the spare. Confirm the separate gauge, power source, cord/hose reach and light source. Practice attaching and removing the connector without losing unnecessary air.
Check one tire against the placard. Add only the amount needed, following the inflator's duty cycle and heat warnings. Recheck with the separate gauge. Pack the tool only after it cools as directed. Put the target-pressure card and manual in the same case.
Add the drill to the family road-trip packing system and the winter car kit. A working inflator is not a substitute for a maintained spare, the vehicle's approved tire-repair equipment or roadside-assistance information.
Roadside boundaries
If a warning appears while driving, slow and move to a safe location according to the vehicle manual and road conditions. Do not stop in a travel lane, on a blind curve or where the adult must kneel beside traffic. Turn on hazard lights as appropriate, keep children restrained and away from the roadway, and call emergency or roadside services when the location is unsafe.
Do not inflate a tire with visible sidewall damage, exposed cords, a bulge, wheel damage, smoke, heat or signs it has been driven flat. Do not crawl under a vehicle or put any part of the body in a traffic lane. An inflator cannot diagnose internal damage. A tire that will not hold pressure needs professional attention.
NHTSA advises that a warm-tire correction is temporary and should be rechecked cold. Follow that guidance and the vehicle manual rather than bleeding a warm tire down to the cold target, which can leave it underinflated after cooling.
What not to buy
- A unit chosen only because it advertises a very high maximum PSI.
- A 12-volt model whose current requirement, plug and reach were never checked against the vehicle.
- A cordless model with a battery ecosystem the family will not charge or inspect.
- A model without an accessible manual, duty-cycle information or identifiable manufacturer.
- A gauge-free system that treats auto-stop as the only measurement.
- An aerosol sealant for routine use without explicit vehicle and tire-manufacturer approval.
- A tool marketed as a flat-tire “fix” without defining damage limits.
Cost and the no-buy option
Prices change too quickly to anchor a safety decision. The no-buy option is a working pressure gauge, monthly checks at a service station, a maintained vehicle spare or manufacturer repair kit, and roadside-assistance access. That system may be better for a family that rarely drives beyond staffed roads.
If buying, compare total system cost: inflator, battery and charger, separate gauge, carrying case and any subscription-free roadside backup. Pay for compatibility and clarity, not a dashboard of invented precision.
What to keep with it
- Vehicle manual and cold-pressure card.
- Separate tire-pressure gauge.
- Inflator manual, correct cable or charged battery and only manufacturer-approved adapters.
- Gloves, kneeling pad and a compact light; see the family lighting guide.
- Roadside-assistance number and location-sharing plan.
- Weather layer and water for a delay, without unloading children near traffic.
Who should skip it
Skip a corded unit if the outlet cannot be verified. Skip cordless if battery maintenance will not happen. Skip a foot pump if the operator cannot use it safely. Skip every inflation attempt when the tire is damaged, the wheel is compromised, the vehicle is unstable or the roadside location exposes the family to traffic. The adult's first job is a safe scene, not saving the itinerary.
Official safety sources
- NHTSA TireWise: pressure, cold checks, TPMS limits and damage guidance
- NHTSA vehicle and tire recall lookup
- U.S. CPSC consumer-product recall search
- Your vehicle, tire and inflator manufacturers' current manuals for model-specific instructions.
MAKE THE WEEKEND COUNT
Useful beats heroic.
Build the day your family can finish well, then leave enough energy for the ride home.
More family plansTHE USEFUL STUFF
Gear that removes friction.
These are practical categories to compare—not a reason to overpack. Check fit, specifications and current reviews before buying.
Paid links: As an Amazon Associate I earn from qualifying purchases. You pay no additional cost.
12-volt portable tire inflators
Verify outlet current, fuse, cord reach, hose reach, duty cycle and the vehicle maker's operating instructions.
See current options → COMPARE ON AMAZONCordless tire inflators
Compare battery compatibility, storage limits, charge-state visibility, duty cycle and a separate pressure-gauge check.
See current options → COMPARE ON AMAZONTire-pressure gauges
Use the vehicle placard for the target and a separate gauge to verify pressure instead of trusting auto-stop alone.
See current options →