GEAR THAT EARNS ITS SPACE
The Family Day-Trip Cooler Guide: Soft, Hard, Backpack, or Skip It?
Match the cooler to the carry, the meal and the heat—not the biggest number on the shelf.
First decide whether you need one
You do not need a cooler for sealed water, whole fruit, shelf-stable snacks and a lunch bought near the destination. Skipping it can be the best system for a museum, short hike or town day. You do need reliable cold storage when the plan includes sandwiches with meat or dairy, cut fruit, yogurt, cooked leftovers or a long hot car ride.
USDA guidance says cold food should stay at 40°F or below. Perishable food should not sit out more than two hours, or more than one hour when the temperature is above 90°F. A cooler is not magic: it needs enough ice or frozen gel packs, shade and a lid that stays closed.
The four-way decision
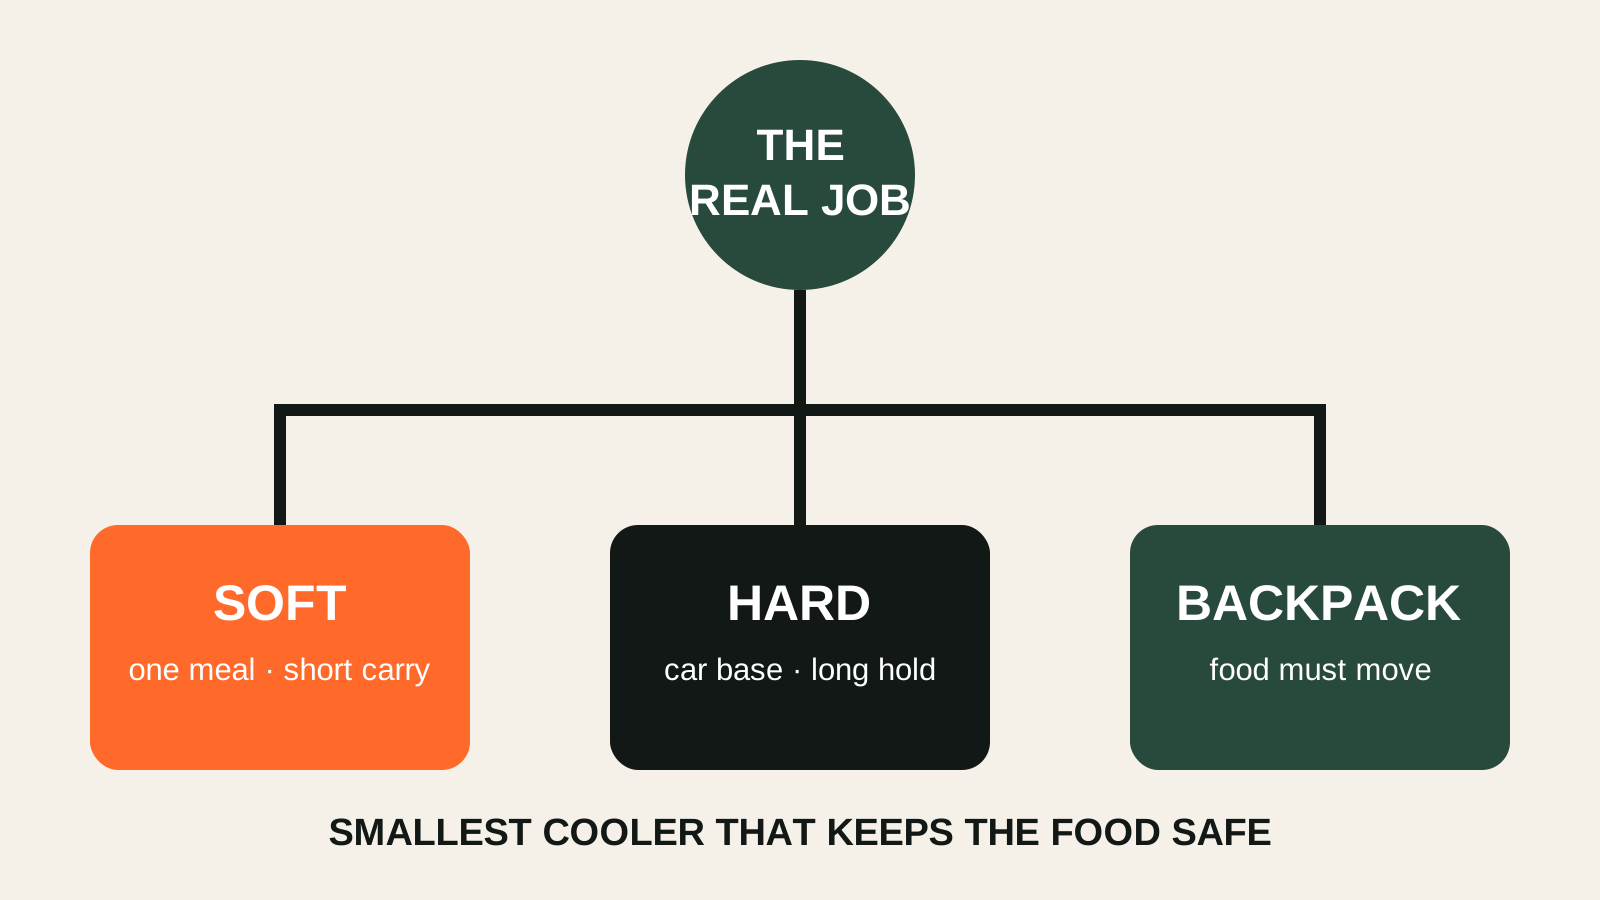
Soft cooler: the default day-trip answer
Pick this for one family meal, short carries and a cooler that needs to collapse after lunch. Look for a wide opening you can clean, a stable bottom, a leak-resistant liner and handles that do not turn a full load into finger punishment. The tradeoff is shorter cold hold and less protection from crushing than a hard shell.
Hard cooler: car base camp
Use a hard cooler when it will mostly live in the vehicle, serve several meals, or be opened repeatedly by a group. It protects food and usually holds ice longer, but capacity invites overpacking. Check the exterior dimensions against your cargo space and confirm that one adult can lift the loaded cooler. Wheels help on pavement; they are often dead weight on stairs, roots, deep gravel or sand.
Backpack cooler: when the food must move
This earns its keep for a picnic reached on foot, a beach with a long walk from parking, or an outing where both hands need to remain free. Evaluate it like a backpack first: shoulder straps, back panel, load shape and a real place for keys. A tall narrow interior can make lunch easy to stack but frustrating to reach. Do not assume “leakproof” without checking the manufacturer’s exact claim and closure instructions.
No cooler: short, simple and local
Buy food near the anchor, pack shelf-stable options, or schedule the trip between meals. This removes cleaning, ice and a return trip to the car. The tradeoff is less control over cost, lines and dietary needs.
Size by the job, not by fantasy
Lay out the containers, drinks and cold packs used on a normal trip. Put them in a box and measure that real load. Leave enough room for cold sources to surround the food, but not a cavern of warm air. Then test the candidate cooler’s external dimensions in the trunk beside the stroller, day packs and spare clothes.
For a single lunch, put most drinks in separate insulated bottles. Kids opening the food cooler every four minutes to browse for a drink destroys the cold plan. For camping or multiple meals, separate ready-to-eat food from anything raw and follow the USDA’s current handling guidance.
The 10-minute packing protocol
- Start cold. Chill food before packing. A cooler should maintain cold, not rescue warm potato salad.
- Add enough cold source. Use ice or frozen gel packs above and around the food, following the cooler maker’s instructions.
- Build meal layers. Last-needed food goes on the bottom; first snack sits near the top.
- Separate drinks. Put frequently opened drinks in bottles or a second small cooler when practical.
- Verify, do not guess. A refrigerator/cooler thermometer gives the adult an actual temperature instead of a hand-on-the-lid opinion.
- Use shade. Keep the cooler out of direct sun and open it only when you know what you are retrieving.
- Call the end. If perishable food has been above 40°F or out past the USDA time limit, discard it. The price of lunch does not change biology.
What not to buy
- A huge hard cooler for two sandwiches and four drinks.
- A wheeled model before checking the surface between parking and picnic.
- A soft cooler with seams and pockets you cannot wipe clean.
- A backpack cooler without a comfortable return plan for the empty containers and trash.
- A powered cooler without checking its voltage, plug, vehicle circuit and manufacturer instructions. Do not improvise wiring or leave a device draining the starting battery.
- Any cooler based only on an advertised ice-retention number. Test methods and real opening patterns differ.
A buying checklist that survives marketing
- Use case: lunch, beach, tournament, road trip or multi-meal camp?
- Carry: how far, over what surface and by whom?
- Fit: exterior dimensions, loaded weight and trunk layout?
- Cold plan: enough room for food and cold packs?
- Cleaning: liner access, drain, seams and drying position?
- Closure: zipper, latch or roll-top that the family can operate correctly?
- Repair: replaceable parts and a manufacturer care guide?
Compare categories, then buy only if an existing cooler fails the job. The gear links below are paid Amazon links added through Mr Adventure Dad’s approved account; they are category searches, not claims that we tested or endorse every result. Check dimensions, current specifications and manufacturer instructions yourself.
One trip to prove the system
Before trusting new gear on an all-day outing, pack it for a local park lunch. Record how much cold source you used, check the thermometer, carry it the real distance and clean it that evening. That is not a laboratory test. It is a low-cost way to find bad assumptions before they become a vacation problem.
Food-safety sources
Safety facts were checked August 22, 2026. Read the current USDA guidance before packing food for heat, long travel or vulnerable family members.
Keep the weekend moving
Use the family day-trip system to protect the day’s energy, the road-trip packing system to make departure easier, and the rainy-day plan when the forecast refuses to cooperate.
THE USEFUL STUFF
Gear that removes friction.
These are practical categories to compare—not a reason to overpack. Check fit, specifications and current reviews before buying.
Paid links: As an Amazon Associate I earn from qualifying purchases. You pay no additional cost.
Soft day-trip coolers
Best for one family meal, a short carry and easy storage after lunch.
See current options → COMPARE ON AMAZONHard coolers for car-base days
Compare loaded weight, exterior dimensions, cleaning access and real cargo-space fit.
See current options → COMPARE ON AMAZONBackpack coolers
Prioritize carry comfort, cleanability and the maker's exact leak-resistance claim.
See current options → COMPARE ON AMAZONCooler thermometers
An actual temperature is more useful than guessing from how the lid feels.
See current options →